.JPG)
I'm on a roll this week! 3 blogs and counting! I'm shocked with all that's been going on with the holidays, then the deconstruction of holiday decor, not to mention the crazy 19 month old I have running around. I guess I'm getting quicker at this stuff.
One of the most wonderful things about this recipe (and so many other desserts) is that you start with such simple, humble ingredients like eggs, cream & sugar and you can turn it into this incredibly divine and sophisticated dessert. All it takes is a little technique. I know this dessert can scare or intimidate people, but you can do it!! I believe in you!
Let me just tell you something, if you do not like creme brulee, it probably wasn't made properly. That is what I tell everyone who doesn't like "custard" desserts. One of those people is my father. He's not into this kind of stuff....until I made him try this. He's now a convert. I converted myself years ago, as a matter of fact! I will actually never forget my first amazing creme brulee experience. My grandmother took me to the Ritz Carlton Hotel in Pasadena before we were to see The Phantom of the Opera when I graduated 6th grade...or maybe it was junior high, I can't remember. It was just her and me. She ordered us the mocha creme brulee and I had never seen anything like it in my life. So intriguing with that first "crack" when you put your spoon onto it... my face lit up! WHOA! This was sooo good! From then on I foolishly ordered it on menus at random "chain" restaurants and such, only to be so disappointed...Why couldn't I find anything that had that same finesse??
Well, there are a lot of bad creme brulees out there. So it wasn't until culinary school where I understood the techniques and realized what places are doing wrong. Too much egg and overcooking. I will never let this happen to my creme brulees and I will know to only order creme brulee from restaurants with competent pastry chefs.
My sister requests me to make this for her birthday every year. (which I did this year, of course) It is so quick to put together, but it just needs a few hours to chill before eating. This is like velvet in your mouth and the crispy crunch of the caramelized sugar top is what makes it such a classic. Creme brulee meaning "burnt cream" is perfectly appropriate because that crunchy sugar top is what sets it apart from all other custards.
This particular recipe is a fail safe. It always comes out perfectly balanced. Not too eggy (I hate that!), it won't hit you over the head with sugar or vanilla flavor. And most important, the texture is beautiful. I've been using it for years, and I will NEVER change it. I even made my instructions a bit more explainative to make it as fool proof as possible even for a novice baker. So go ahead and give it a try! Let me know how it comes out :)
Vanilla
Bean Crème Brulee (serves 6)
Adapted From: Emeril Lagasse
2
cups heavy cream
1
cup milk
1
vanilla bean, split and scraped well
6
large egg yolks
1/2
cup granulated sugar, plus 6 tablespoons
Extra sugar for bruleeing the top
6 (5oz) ramekins
Preheat your oven to 350.
Then start by heating the cream, milk and vanilla bean seeds as well as the whole vanilla bean in a medium saucepan over med heat. (Do not boil!) Turn off the heat when small bubbles start to form and pop along the sides of the pot. Takes about 10 minutes. Let sit for 10 minutes, if you can. This infuses the vanilla into the cream even more.

While the cream is heating, whisk the sugar and egg yolks in a medium bowl.

While the cream is still warm, take a ladle and SLOOOOWLY add the hot cream into the eggs, whisking constantly. Keep ladling until about half of the cream mix is used, then you can safely pour the rest of the cream in. (We are just tempering the eggs, which means that we are slowly bringing them up to the warm temperature without cooking the eggs. If you just dump hot liquid into eggs, you will have a nice batch of sweet scrambled eggs on your hands....gross.)

Next, pour your creme brulee mix through a fine strainer into a clean bowl or a large measuring cup.You want to catch all those bits of vanilla bean and if any eggs did cook a little.

Set up your creme brulee ramekins (any shape as long as they are about 5 oz.) and fill them up! Divide the mix equally. Sometimes there is a bit leftover, you can discard or make another one...

Carefully place the pan in the oven. Then, fill up a pitcher or cup with HOT water and carefully fill the pan around the dishes with the water to create a water bath. Fill about half way up the side of the dishes, careful not to get any water in the creme brulees! (I find it easiest to use a pitcher and fill it pretty full even though you will not use all the water. It just is easier to pour without burning yourself)

Bake for about 30 minutes. This is where the only crucial part comes in. Sometimes it take less, sometimes it takes more. All ovens run differently and ramekin shapes vary. The key is to check it after about 15-20 minutes just to see the progress. Gently jiggle the pan and you can tell if they still look liquidy or they have just "set". You want a good the brulees to have a good "jiggle" to them, but not in a liquidy way. (you'll see the difference.) If you overcook them, they can curdle and it's not really salvageable at that point. Just make sure you don't get distracted doing something else during this stage.
Also, I find that some set quicker than others because my oven isn't always even in cooking. So I CAREFULLY remove them with tongs or oven mitts and set them on the counter to cool. When they are all cooked, remove them from the water bath and set them on the counter to come to room temp. I then cover them with plastic wrap and put them in the fridge to chill. At least 3 hours. They can also be made up to 3 days in advance at this point!
I had a little helper with high hopes of me dropping something....

When ready to serve: Take a couple spoonfuls of sugar and gently shake the sugar around to completely coat the top of the custard evenly. You can dump any access sugar on the next ramekin.

Then the fun part....the brulee! Guests like to watch this part because fire is always fun :) Take your torch, or turn your oven on Broil. (If you broil: Make sure it's VERY hot and the brulees are very cold. You don't want to warm up the brulees and melt the custard.) These little torches are not that pricey and they come in handy, so I recommend picking one up. You can get one here. They also sell them in a set with ramekins too!
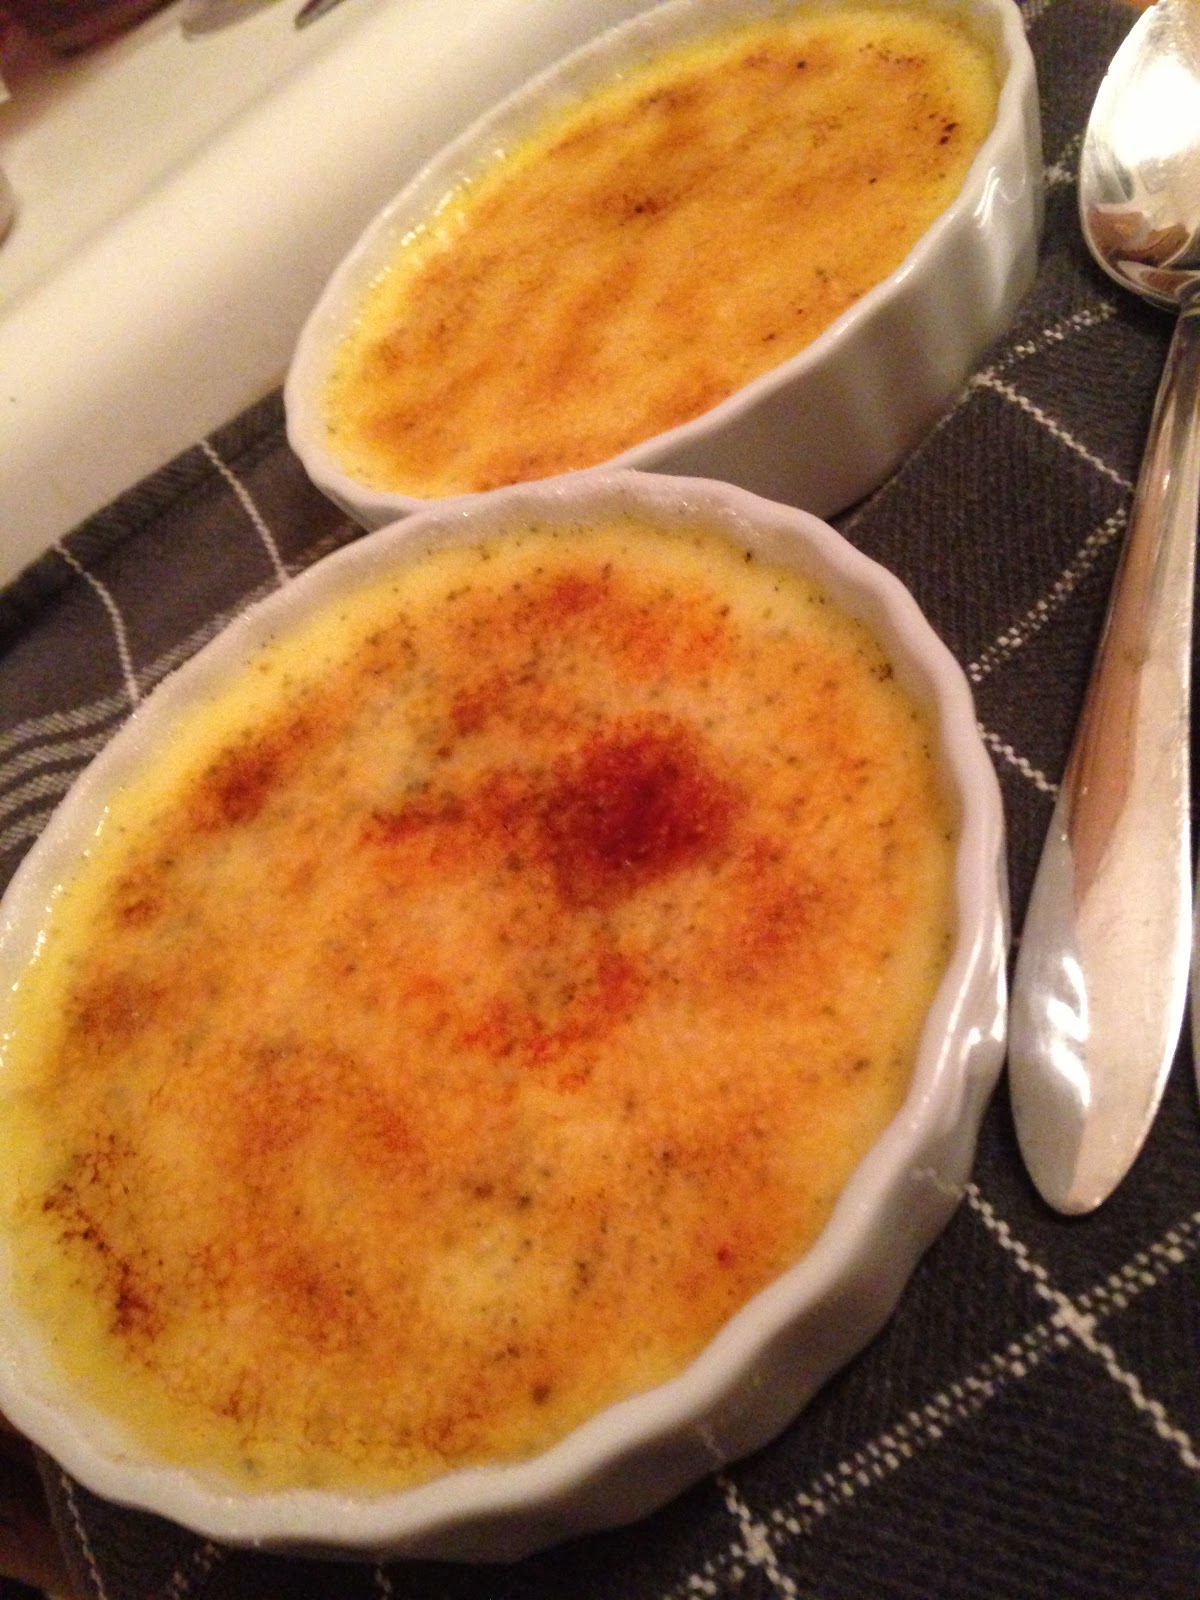
Evenly melt and caramelize the sugar. hold the torch about an inch away and move around the surface. Do it as dark as you like it, just don't burn it. Bitter!

Let the sugars cool for a sec so they get that crispy lid on top and serve! I like to serve mine with berries or some sort, maybe a crispy cookie to cut the creamy, dreamyness of the custard. (I actually make thin, crispy neutella sandwich cookies for my sis's bday. Heaven!
My beautiful sister was pretty happy! Great 30th bday dessert! (you can see the crazy cookie I put next to it ;) I'm a little over-the top sometimes)

Bon Appetit!

Vanilla Bean Crème Brulee (serves 6)
Adapted From: Emeril Lagasse
2 cups heavy cream
1 cup milk
1 vanilla bean, split and scraped well
6 large egg yolks
1/2 cup granulated sugar, plus 6 tablespoons
Extra sugar for bruleeing the top
6 (5oz) ramekins
Preheat your oven to 350.
Then start by heating the cream, milk and vanilla bean seeds as well as the whole vanilla bean in a medium saucepan over med heat. (Do not boil!) Turn off the heat when small bubbles start to form and pop along the sides of the pot. Takes about 10 minutes. Let sit for 10 minutes, if you can. This infuses the vanilla into the cream even more.
While the cream is heating, whisk the sugar and egg yolks in a medium bowl.
While the cream is still warm, take a ladle and SLOOOOWLY add the hot cream into the eggs, whisking constantly. Keep ladling until about half of the cream mix is used, then you can safely pour the rest of the cream in. (We are just tempering the eggs, which means that we are slowly bringing them up to the warm temperature without cooking the eggs. If you just dump hot liquid into eggs, you will have a nice batch of sweet scrambled eggs on your hands....gross.)
Next, pour your creme brulee mix through a fine strainer into a clean bowl or a large measuring cup.You want to catch all those bits of vanilla bean and if any eggs did cook a little.
Set up your creme brulee ramekins (any shape as long as they are about 5 oz.) and fill them up! Divide the mix equally. Sometimes there is a bit leftover, you can discard or make another one...
Carefully place the pan in the oven. Then, fill up a pitcher or cup with HOT water and carefully fill the pan around the dishes with the water to create a water bath. Fill about half way up the side of the dishes, careful not to get any water in the creme brulees! (I find it easiest to use a pitcher and fill it pretty full even though you will not use all the water. It just is easier to pour without burning yourself)
Bake for about 30 minutes. This is where the only crucial part comes in. Sometimes it take less, sometimes it takes more. All ovens run differently and ramekin shapes vary. The key is to check it after about 15-20 minutes just to see the progress. Gently jiggle the pan and you can tell if they still look liquidy or they have just "set". You want a good the brulees to have a good "jiggle" to them, but not in a liquidy way. (you'll see the difference.) If you overcook them, they can curdle and it's not really savable at that point. Just make sure you don't get distracted doing something else during this stage.
Also, I find that some set quicker than others because my oven isn't always even in cooking. So I CAREFULLY remove them with tongs or oven mitts and set them on the counter to cool. When they are all cooked, remove them from the water bath and set them on the counter to come to room temp. I then cover them with plastic wrap and put them in the fridge to chill. At least 3 hours. They can also be made up to 3 days in advance at this point!
Then the fun part....the brulee! Take your torch, or turn your oven on Broil. (If you broil: Make sure it's VERY hot and the brulees are very cold. You don't want to warm up the brulees and melt the custard.)
Evenly melt and caramelize the sugar. hold the torch about an inch away and move around the surface. Do it as dark as you like it, just don't burn it. Bitter!
Let the sugars cool so they get that crispy lid on top and serve! I like to serve mine with berries or some sort, maybe a crispy cookie to cut the creamy, dreaminess of the custard. Bon Appetit!
No comments:
Post a Comment